
Are you tired of the limitations of static web pages? Do you wish your website could offer a more interactive and dynamic experience? Look no further! In this blog post, we will walk you through creating a dynamic tabbing interface using HTML, CSS, and JavaScript. This tutorial will help you implement a browser-like experience on your website, allowing users to open, switch, and close tabs effortlessly.
Step 1: Setting Up the HTML Structure
We'll start with the basic HTML layout. This structure includes a container for the tabs and the content area. We'll use Bootstrap for styling the tabs and content.
<!DOCTYPE html>
<html lang="en">
<head>
    <meta charset="UTF-8">
    <meta name="viewport" content="width=device-width, initial-scale=1.0">
    <title>Dynamic Tabbing Interface</title>
    <link rel="stylesheet" href="https://stackpath.bootstrapcdn.com/bootstrap/4.5.2/css/bootstrap.min.css">
    <style>
        /* Add your CSS styling here */
    </style>
</head>
<body>
    <div class="container">
        <ul class="nav nav-tabs" id="myTabs">
            <li class="nav-item">
                <a class="nav-link active" data-toggle="tab" href="#home">Home</a>
            </li>
        </ul>
        <div class="tab-content" id="tabContent">
            <div class="tab-pane active" id="home">
                <h1>Welcome to the Home Page</h1>
                <p>This is the default content for the Home tab.</p>
                <a href="linkpath.html" title="Tab Title" class="dynamic-tab-link">See here</a>
            </div>
        </div>
    </div>

    <script src="script.js"></script>
</body>
</html>
Step 2: Styling with CSS
Next, let's add some CSS to customize the appearance of the tabs and content areas. The following CSS ensures the tabs look visually appealing and intuitive.
.nav-tabs {
    background-color: #00080f !important;
    border-bottom: 2px solid rgb(0, 0, 17) !important;
}
.nav-tabs .nav-item {
    margin: 0px;
    border-right: 1px solid white;
    border-radius: 0px;
    overflow: hidden;
    display: flex;
    align-items: center;
}
.nav-tabs .nav-link {
    border: none !important;
    border-radius: 0 !important;
    padding: 5px 20px;
    background: #eeeeee;
    color: rgb(0, 2, 19);
    font-family: Arial, Helvetica, sans-serif;
    transition: background-color 0.3s, color 0.3s;
    display: flex;
    align-items: center;
    justify-content: space-between;
}
.nav-tabs .nav-item.show .nav-link, .nav-tabs .nav-link.active {
    color: #fff !important;
    background-color: #000f1c !important;
    border-color: none!important;
    font-family: monospace !important;
    font-style: italic !important;
}
.nav-tabs .nav-link:hover {
    background-color: #00080f;
    color:#eeeeee;
}
.nav-tabs .nav-item.show .nav-link, .nav-tabs .nav-link.active:hover {
    background-color: #000f1c;
    color: #fff !important;
}
.tab-pane {
    border: none !important;
    border-radius: 0px !important;
    padding: 0px;
    margin-top: 0;
}
.tab-content {
    background: black;
    color: white;
    border: none;
    padding: 20px;
    height: 93vh;
}
.close-tab {
    margin-left: 0.5rem;
    cursor: pointer;
}
Step 3: Adding JavaScript Functionality
Finally, let's add the JavaScript code to manage the dynamic tabbing functionality. The script below handles opening new tabs, switching between tabs, loading content dynamically using AJAX, and closing tabs.
document.addEventListener("DOMContentLoaded", function () {
    window.addEventListener('message', function(event) {
        var tabName = event.data.tabName;
        var linkPath = event.data.linkPath;
        openOrSwitchTab(tabName, linkPath);
    });

    document.querySelectorAll('.nav-link').forEach(function (link) {
        link.addEventListener("click", function (event) {
            event.preventDefault();
            showTabContent(link);
        });
    });

    function openOrSwitchTab(tabName, linkPath) {
        var formattedTabName = tabName.replace(/\s+/g, '-').toLowerCase();

        // Check if tab already exists
        var existingTabLink = document.querySelector('.nav-link[href="#' + formattedTabName + '"]');
        if (existingTabLink) {
            // Switch to the existing tab
            showTabContent(existingTabLink);
            return;
        }

        // Create tab link
        var newTabLink = document.createElement("a");
        newTabLink.classList.add("nav-link");
        newTabLink.setAttribute("data-toggle", "tab");
        newTabLink.setAttribute("href", "#" + formattedTabName);
        newTabLink.innerHTML = tabName +'×';

        // Create tab list item
        var newTabListItem = document.createElement("li");
        newTabListItem.classList.add("nav-item");
        newTabListItem.appendChild(newTabLink);
        document.getElementById("myTabs").appendChild(newTabListItem);

        // Create tab pane
        var newTabPane = document.createElement("div");
        newTabPane.classList.add("tab-pane");
        newTabPane.setAttribute("id", formattedTabName);
        document.getElementById("tabContent").appendChild(newTabPane);

        // Add event listener to the newly created tab link
        newTabLink.addEventListener("click", function (event) {
            event.preventDefault();
            showTabContent(newTabLink);
        });

        // Add event listener to the close button
        newTabLink.querySelector('.close-tab').addEventListener("click", function (event) {
            event.stopPropagation();
            closeTab(formattedTabName, newTabListItem, newTabPane);
        });

        // Load content via AJAX using fetch
        loadTabContent(formattedTabName, linkPath);

        // Activate the new tab
        newTabLink.click();
    }

    function showTabContent(link) {
        document.querySelectorAll('.tab-pane').forEach(function (pane) {
            pane.classList.remove('active');
        });

        document.querySelectorAll('.nav-link').forEach(function (navLink) {
            navLink.classList.remove('active');
        });

        var targetPane = document.querySelector(link.getAttribute('href'));
        link.classList.add('active');
        targetPane.classList.add('active');
    }

    async function loadTabContent(tabId, url) {
        var tabPane = document.getElementById(tabId);
        try {
            var response = await fetch(url);
            if (response.ok) {
                var content = await response.text();
                tabPane.innerHTML = content;

// Attach event listener to the new links after loading content
                attachDynamicTabLinks();
            } else {
                tabPane.innerHTML = 'Failed to load content.';
            }
        } catch (error) {
            tabPane.innerHTML = 'Error loading content: ' + error.message;
        }
    }

    function attachDynamicTabLinks() {
        document.querySelectorAll('.dynamic-tab-link').forEach(function (link) {
            link.addEventListener("click", function (event) {
                event.preventDefault();
                window.parent.postMessage({
                    tabName: event.currentTarget.title,
                    linkPath: event.currentTarget.getAttribute('href')
                }, '*');
            });
        });
    }

    function closeTab(tabId, tabListItem, tabPane) {
        tabListItem.remove();
        tabPane.remove();

        // Activate the Home tab if the closed tab was active
        if (tabListItem.querySelector('.nav-link').classList.contains('active')) {
            showTabContent(document.querySelector('.nav-link[href="#home"]'));
        }
    }

    attachDynamicTabLinks();
});
Pros and Cons
Pros:
- Dynamic User Experience: Provides a browser-like interface within a single web page.
- Seamless Content Loading: Loads content dynamically without refreshing the entire page.
- Easy Navigation: Allows users to switch between multiple tabs easily.
Cons:
Complexity: Requires JavaScript for full functionality, which may be complex for beginners.
Use Cases
- Dynamic Tabbing: Perfect for creating a sophisticated tabbing interface within web applications.
- Browser-like Applications: Ideal for building browser-like multi-tab static HTML applications.
- Dashboards: Great for dashboards and data-driven applications where multiple views or reports are needed.
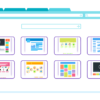
Live Demo Preview
Click Here to see live preview
Conclusion
By following these steps, you can create a dynamic tabbing interface that enhances user experience by providing a browser-like environment within your web page. Users can open, switch, and close tabs seamlessly, and content is loaded dynamically without refreshing the entire page. This approach is perfect for web applications, dashboards, and any project that requires a sophisticated, interactive interface.
Happy coding!


Leave a Reply